Motivation
About a year ago, I backed the Raspad 3 Kickstarter because at the time, I was interested in building a linux tablet of some type. I ended up with a somewhat flaky Raspberry Pi 3 that when I first got it would segfault when booting known good SD cards that worked fine in a different Pi 3. After a while, the Pi 3 seemed to become more stable (still not sure why, though I think I dropped it at some point) and I decided that I was going to try to put this pi into the Raspad 3, despite it being specifically designed to accommodate a Pi 4. Well, I come to find out that the internal touch screen wouldn't appear in the list of USB devices, and I initially thought I had a defective product. After contacting their customer support, I learned that the controller board disables the touch screen if it detects that a screen is plugged into the Raspad by checking to see if a connection in the HDMI connector is grounded or something like that, and as a byproduct of this, the touchscreen also gets disabled if the 2nd HDMI connector isn't connected to the Pi 4.
Mitigations
Understandably, despite the hardware limitations, I still wanted to use an older Pi with this device. I eventually came across a forum post in the mister FPGA forums that described how someone was able to modify their raspad to use it with an FPGA, including making the touchscreen be always active.
How to modify your Raspad
Warning
This mod has the potential to damage your Raspad and the raspberry pi. Proceed at your own risk. I cannot take responsibility for you breaking your hardware.
The mod is actually quite simple. though the forum states that there's another method to fix this, we're going to take the bodge wire approach.
Here's what you'll need
- Thin wire (I used AWG30 wire wrapping wire)
- Solder
- Kapton tape
- A soldering iron
- The ability to solder a thin wire on tiny components
- (optional) Usb type A to usb type A cable
Steps
- Disassemble your Raspad
- Disconnect the battery, speaker, and the flat flex cable that goes to the board with the buttons and LEDs (be careful, the flat flex connector is fragile) from the controller board
- Unscrew the controller board, taking care not to break the still-attached cables underneath
- Disconnect the display flat flex cable, and the cable to the touch screen
- Solder the bodge wire as shown in the picture. This wire will ensure that the touchscreen controller will always be powered regardless of the hdmi connections.
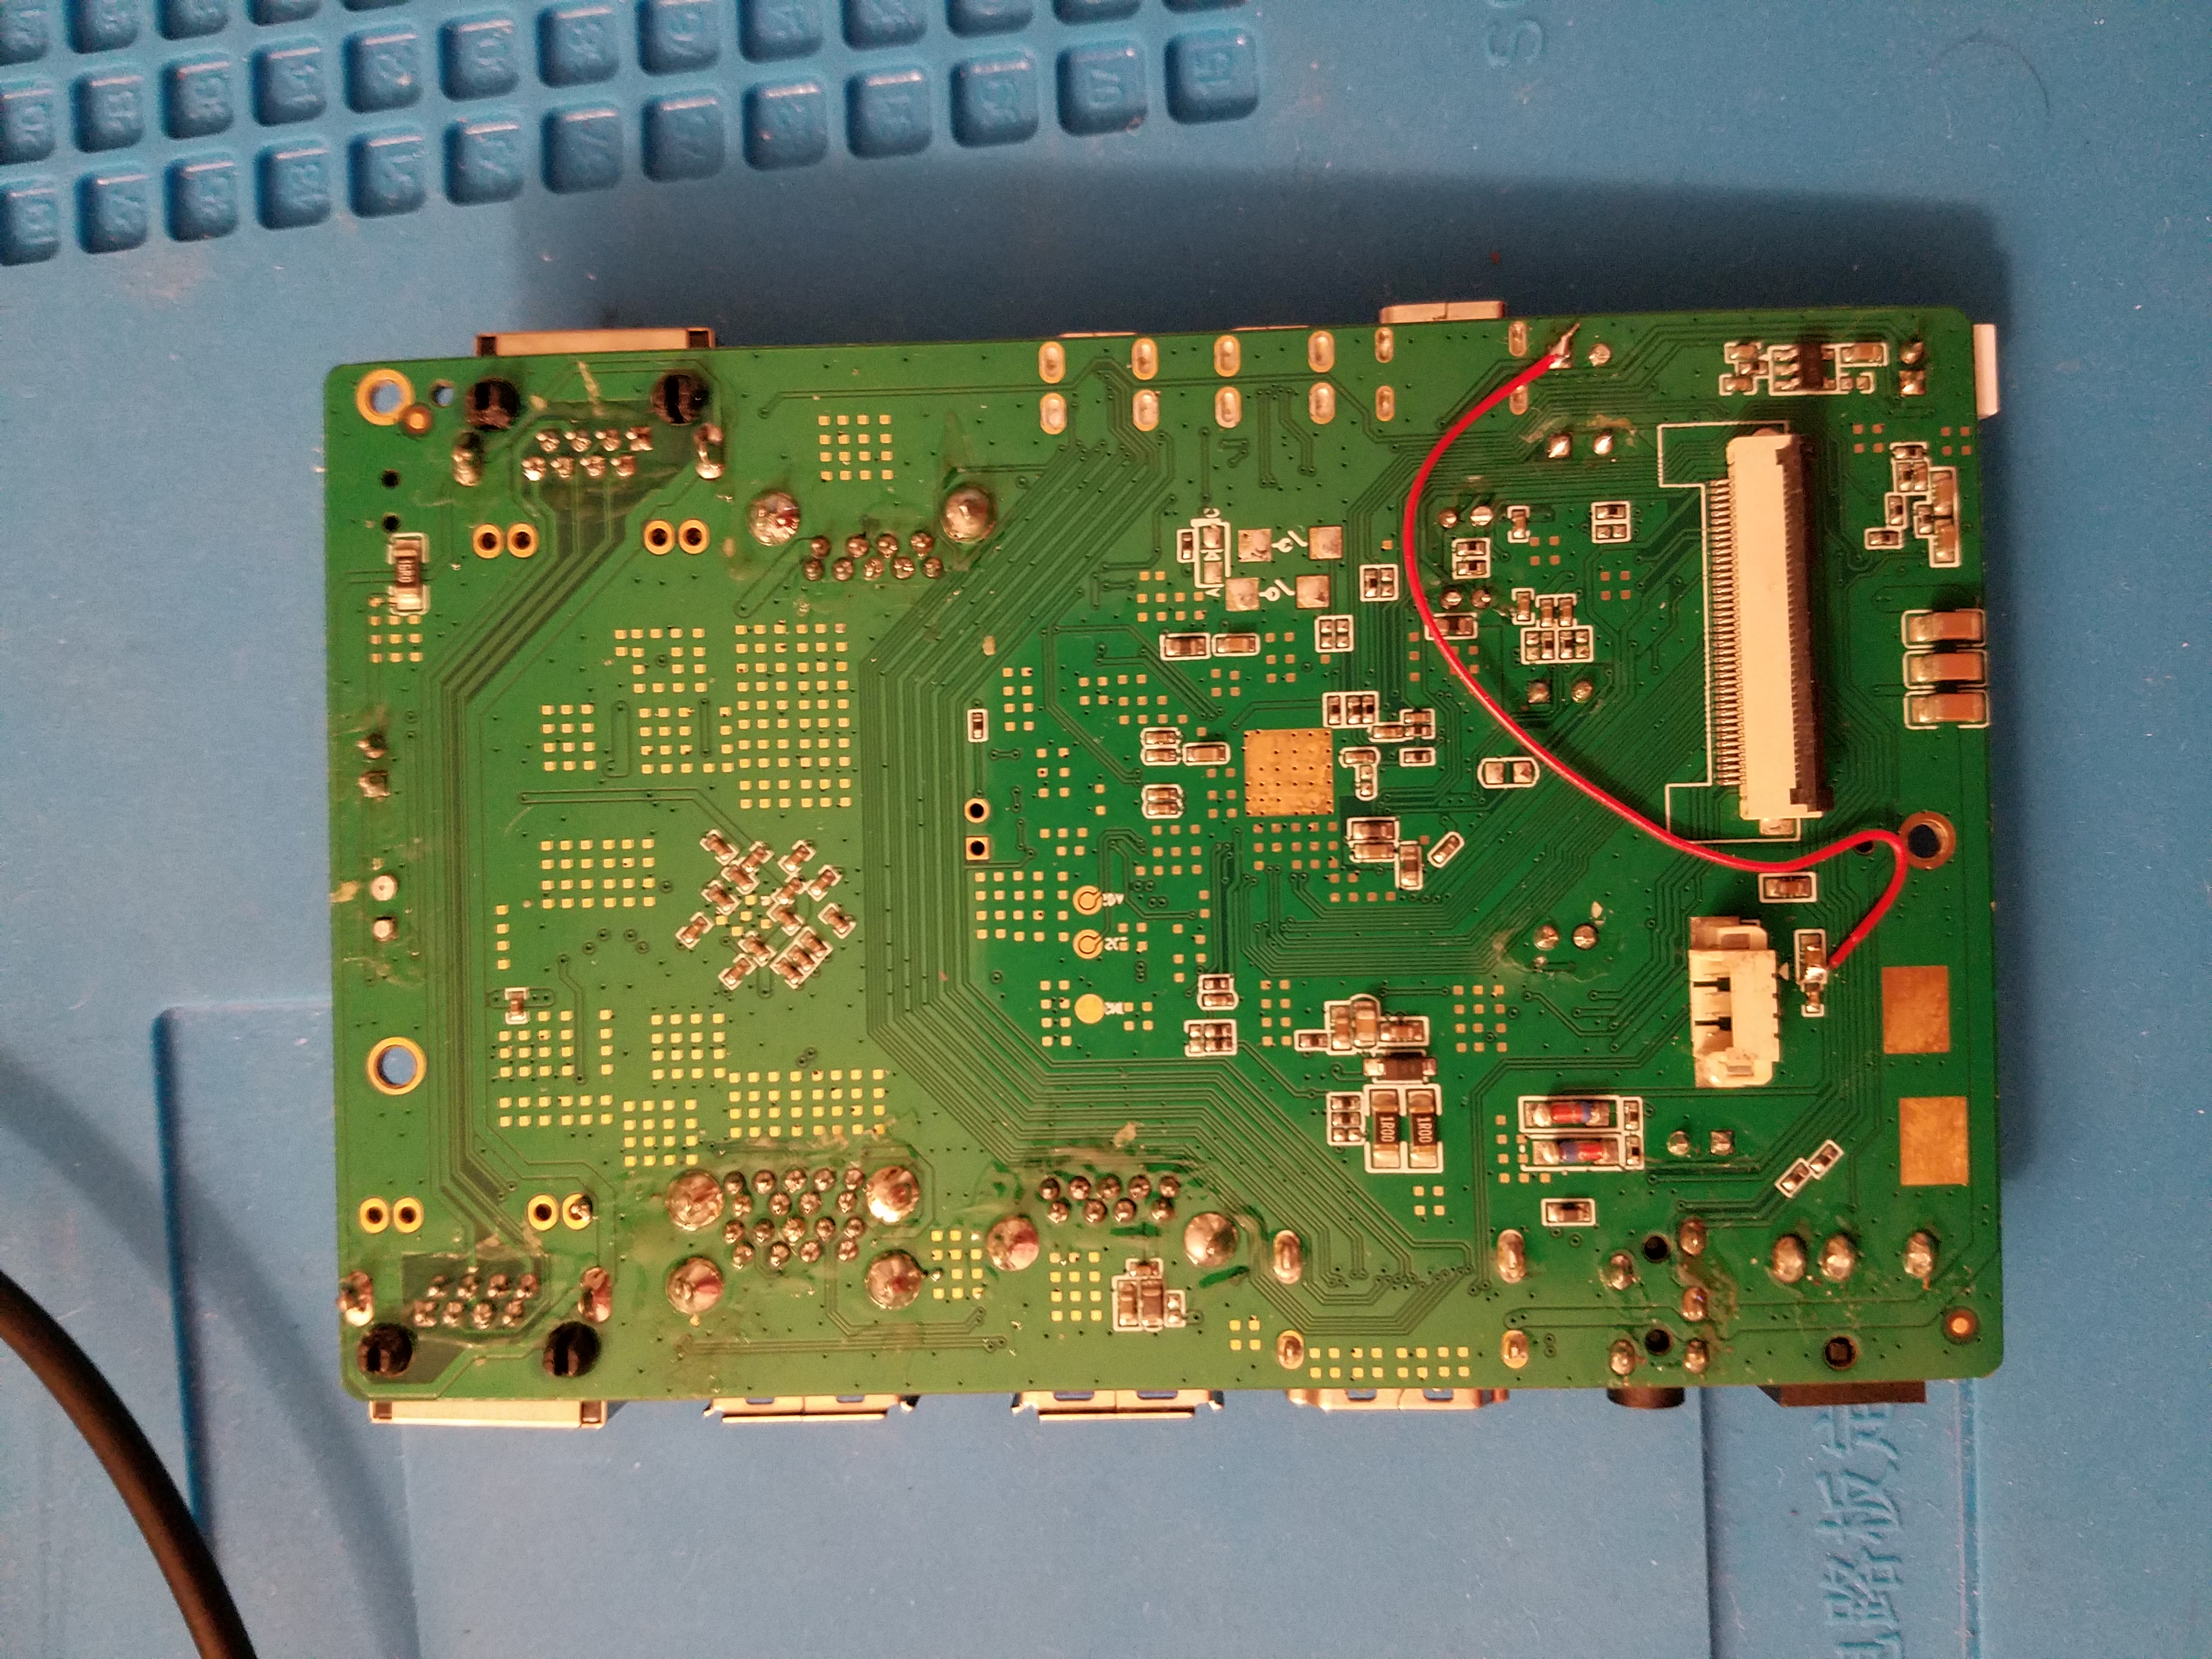
Be careful not to bridge the gap between the 2 capacitors (?)
- Connect the battery to the controller board, then connect the flat flex cable to the power button and LED board, and attempt to turn on the tablet
- This is what's commonly known as a "smoke test", or a test to see if something lets out the magic smoke. If nothing happens, that's a good sign.
- Might be worth plugging the tablet's internal
-
Make sure that the tablet is off, disconnect the battery, and reconnect the display's flat flex cable, and the touch screen controller board cable. Also take the time to tape down the wire to the board to ensure that it doesn't get ripped out accidentally.
-
Reconnect the raspberry pi, and check to see if the touch screen works
- At this point, the touch screen should be connected. On your linux system, open a terminal and run
lsusb. You should see the following line:
Bus 001 Device 006: ID 222a:0001
... other devices
If the touch screen doesn't work on your Pi, but you see the usb devices, you can take a longer cable and connect it to a windows computer to see if it recognizes it.
- Screw down the controller board and ensure that the rest of the cables are reconnected. You may now re-assemble the tablet.
In the next article, we'll explore a linux installation that takes advantage of the tablet form-factor.